CapCut Quick Start Checklist for Beginners
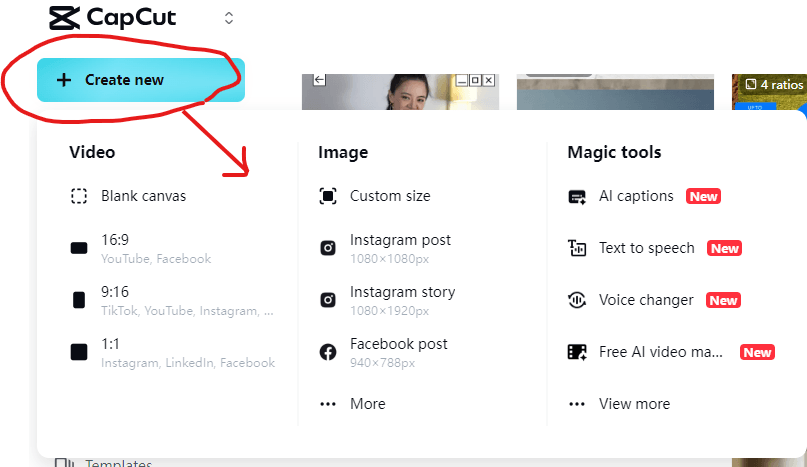
In this CapCut screen, you can:
Click Create new to start a new video project and choose an aspect ratio like 16:9 (YouTube) or 9:16 (TikTok).
Design images for different platforms such as Instagram posts, stories, or Facebook.
Use Magic Tools — including new features like AI captions, text-to-speech, and voice changer.
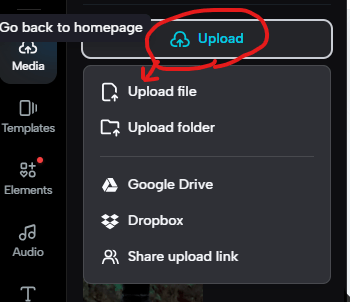
In this CapCut screen, you can upload your media in several ways:
Click Upload file to add videos or images from your computer.
Choose Upload folder to import multiple files at once.
Connect to Google Drive or Dropbox to upload directly from cloud storage.
Or use Share upload link to let others send files straight into your project.
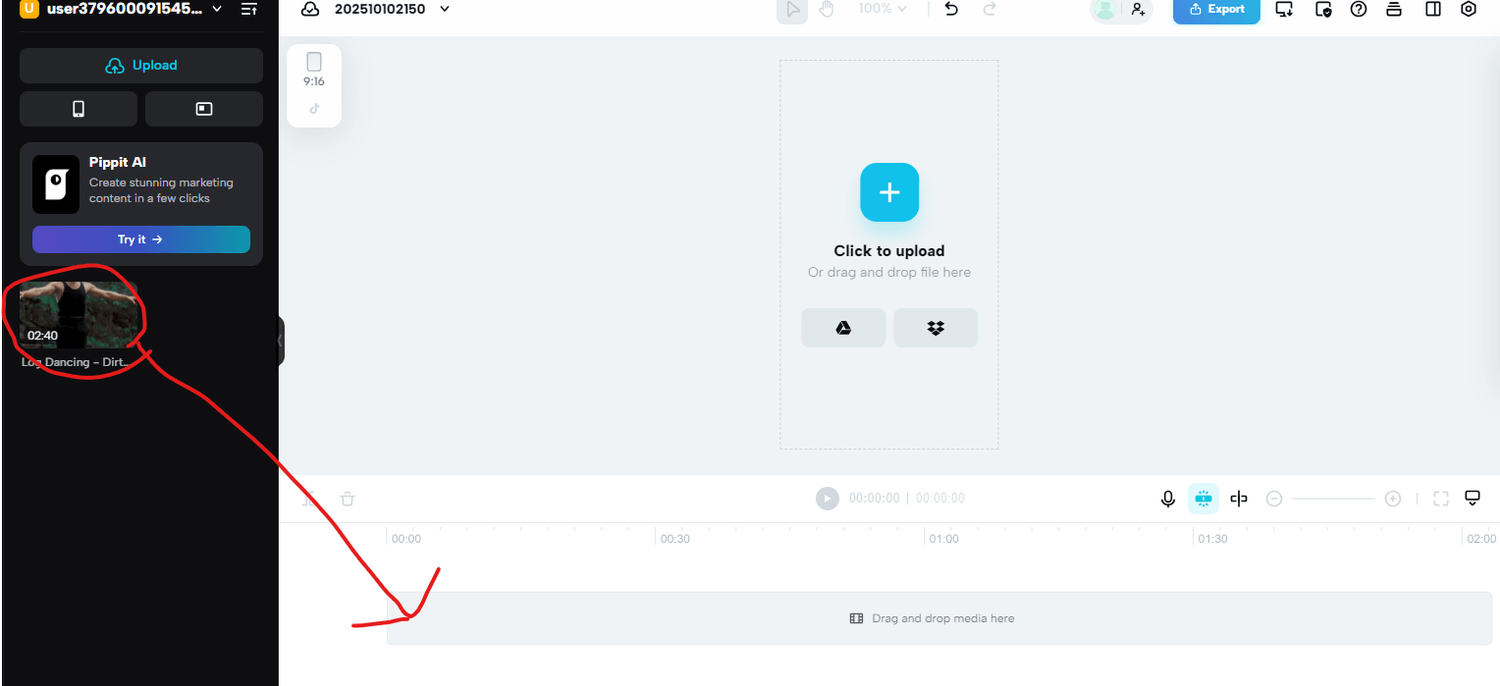
Once your video file appears on the left side, simply drag it down to the timeline at the bottom of the screen.
This will add the clip to your project, allowing you to edit, trim, split, or add effects directly to it.
Now it’s time to have some fun and explore! 🎬
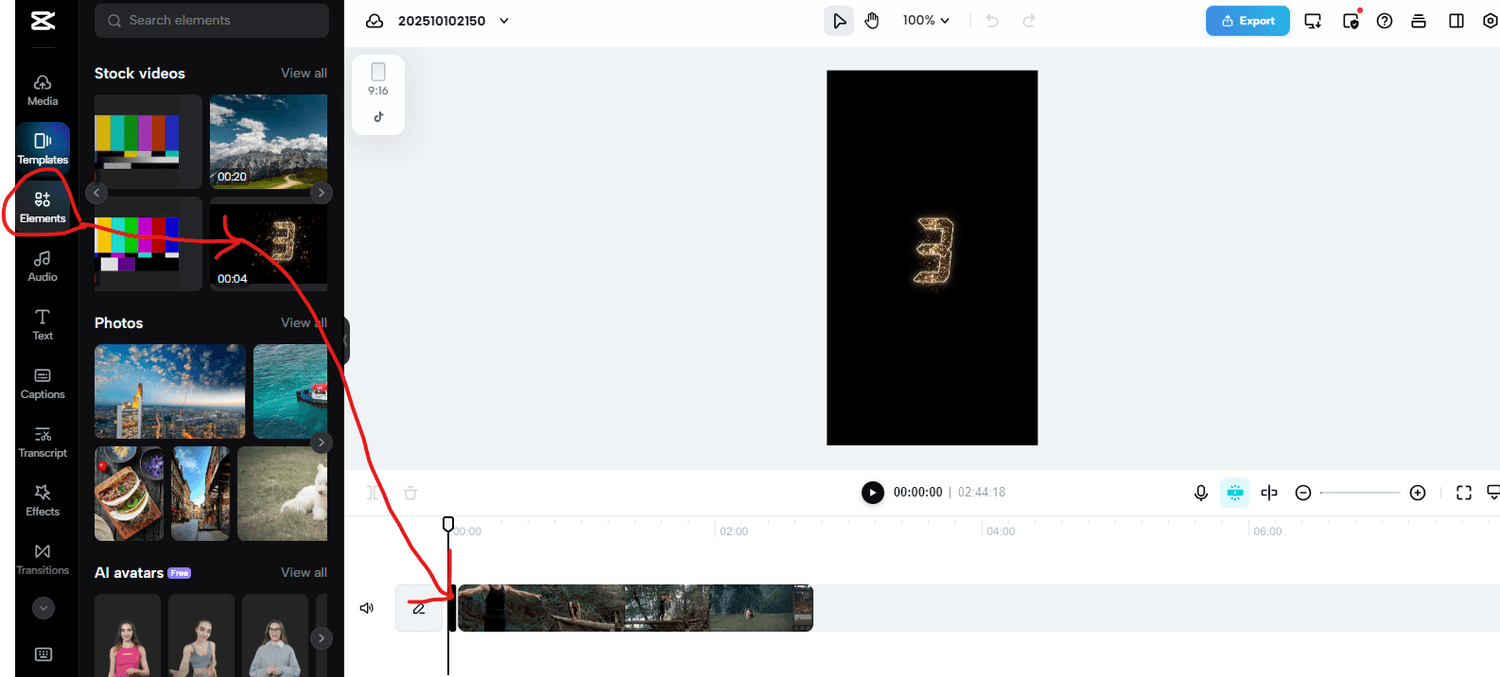
In this example, I went to the Elements tab and added a short countdown clip — from 3 to 1 — to use as my video intro before the main clip starts.
Try playing around with different elements, effects, and transitions — this is where you can really start to make your video your own! ✨
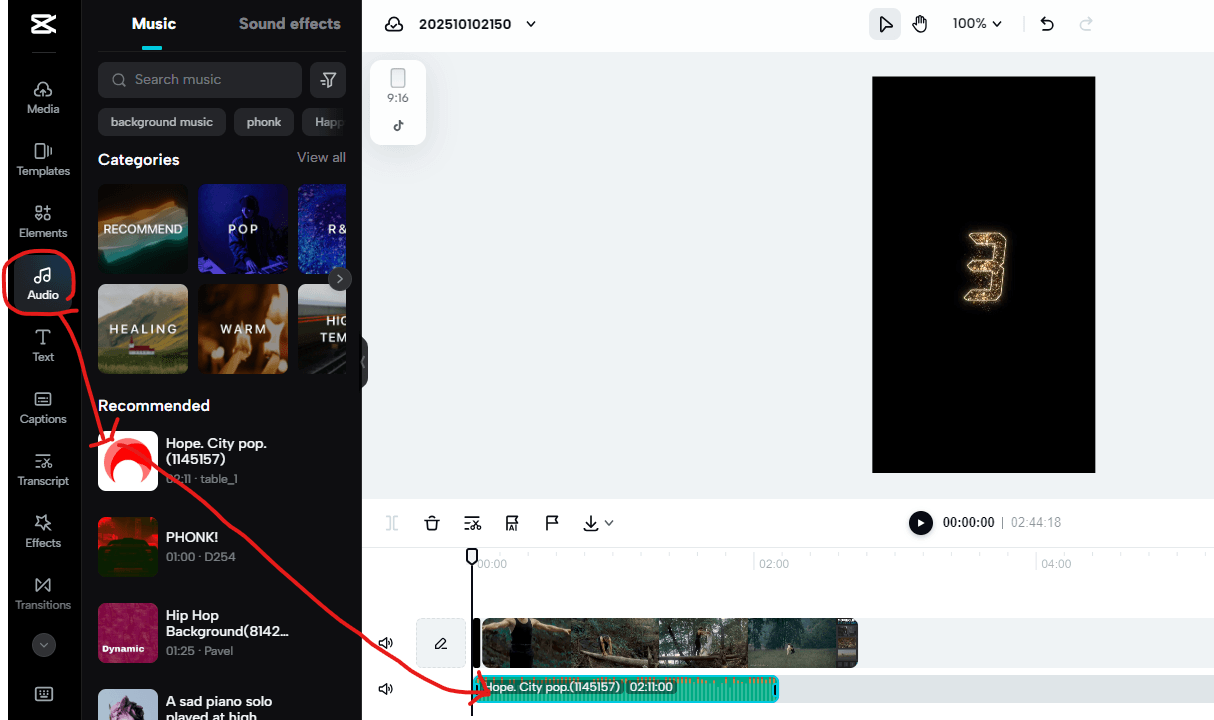
Here I decided to add music to my video 🎵
I clicked on the Audio tab and selected a track. Once you choose your audio, it automatically appears on the timeline below your video — meaning it will play in sync with your clip.
Everything you see on the timeline — whether it’s video, music, or effects — can be shortened, extended, or moved by simply dragging the edges.
At the top, you can press Play to preview how your video and music look and sound together in real time. 🎬
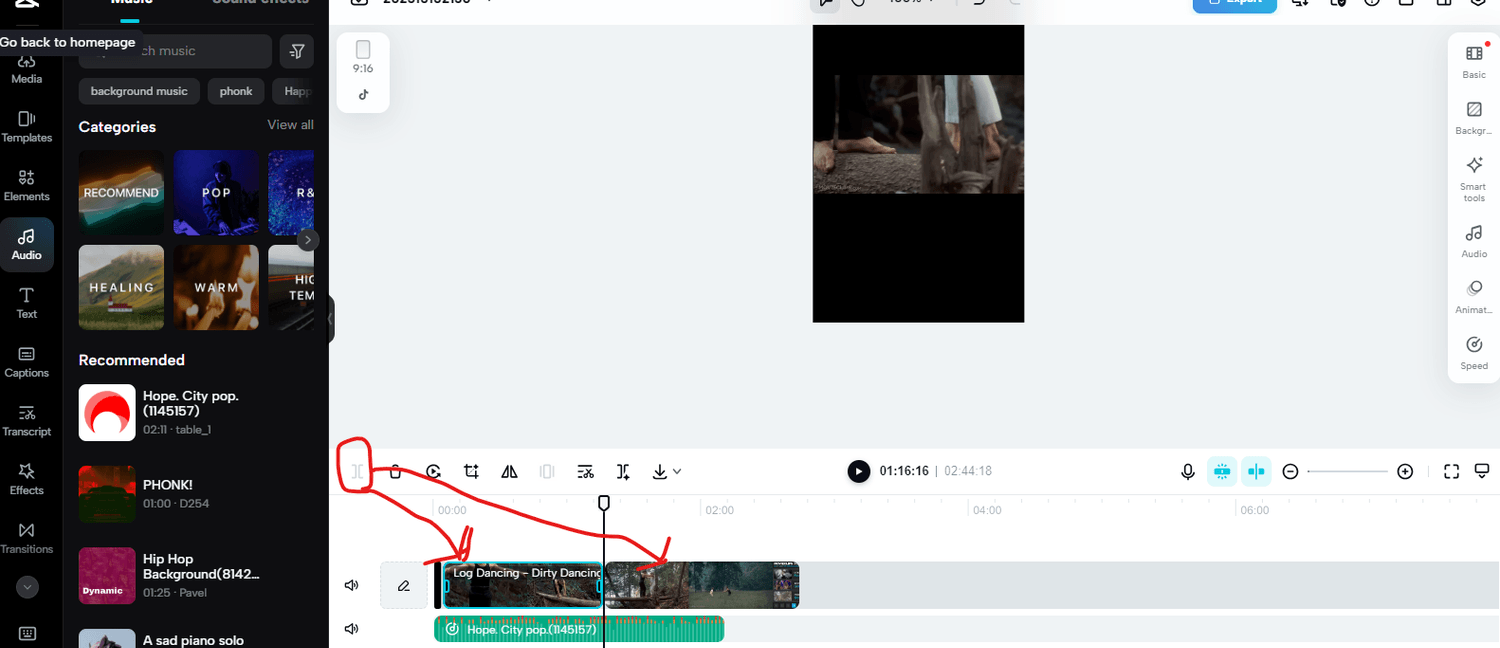
✂️ The Split Tool
The Split tool is one of the most important features in CapCut — it allows you to cut your video into smaller parts, so you can remove, rearrange, or edit specific moments without touching the rest of the clip.
It’s especially useful when creating YouTube Shorts, TikToks, or Reels, because short videos rely on fast pacing and precise timing. By splitting, you can trim out boring parts, keep only the highlights, and make your content flow smoothly.
👉 In short — the Split tool gives you control, creativity, and helps make your videos more engaging and professional.
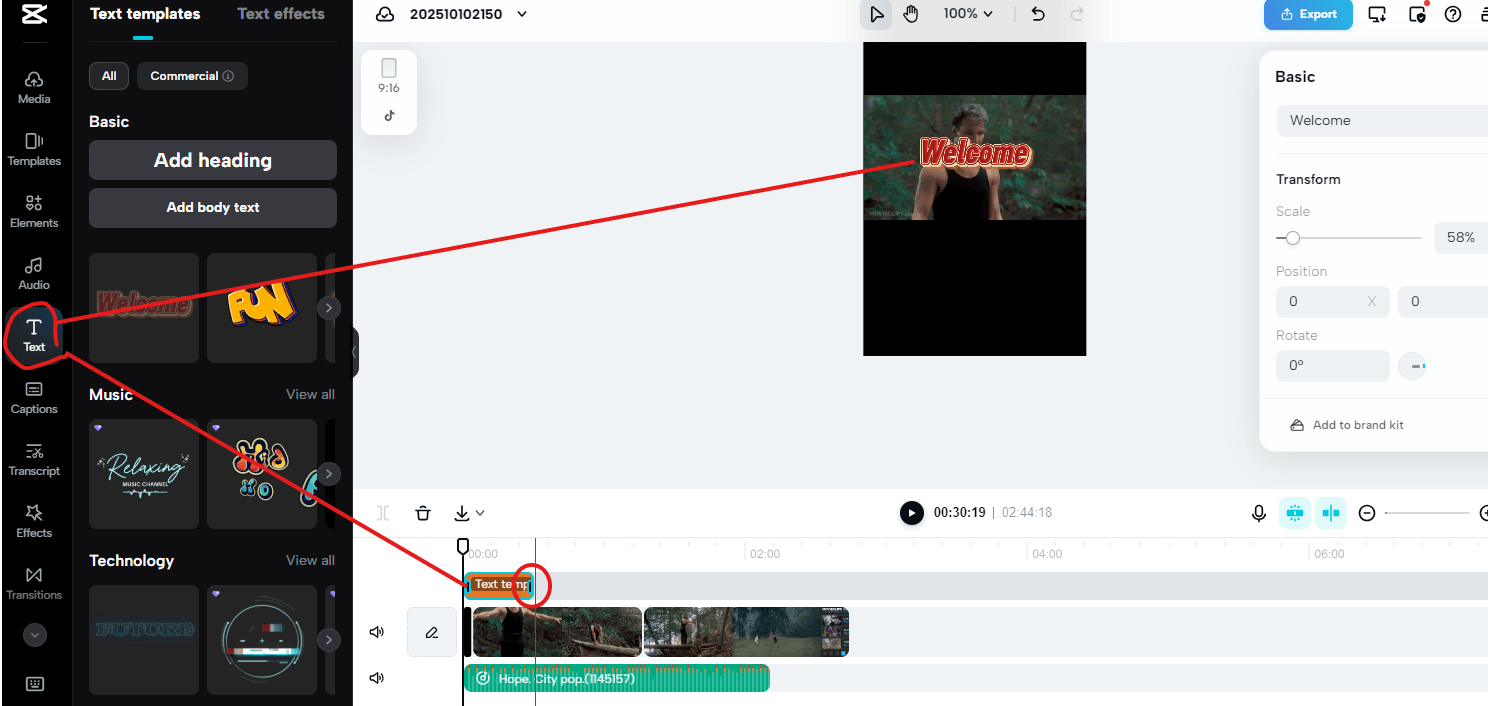
📝 Adding Text to Your Video
Text plays a big role in making your video clear, engaging, and professional — whether it’s a title, caption, or short message for your viewers.
When you add text in CapCut (from the Text tab), it automatically creates a new layer on the timeline — just like in the image. This new layer lets you control how long the text appears in your video.
👉 The small bar I circled shows the duration of your text — you can drag it to make it appear for a shorter or longer time.
Now you have video, audio, and text — the three core building blocks of a great edit! 🎬
🎯 Final Tip — Just Dive In!
The best way to really learn CapCut is to sit down and explore.
Try every button, test new tools, and don’t be afraid to make mistakes — that’s how you discover what works best for you.
The more you play with the software, the faster you’ll understand it and start creating videos that actually look professional. So go ahead — experiment, create, and have fun! 🚀
Click the link below to see how CapCut Pro can transform your videos
Home | Privacy Policy | About Me | Contact | Affiliate Disclosure
© Copyright 2025
All rights reserved
Create Your Free Account